
I’m excited to finally release this Hunger Games themed image and along with it a tutorial about how to blend photography with 3D. Specifically, how to create a believable photo composite inside a 3D-rendered background.
Let me start by saying, this is a little bit of a fringe tutorial. It’s targeted at artists who have a minimal knowledge of both 3D modelling/rendering as well as studio photography (including studio lighting). But if you’re just a photographer or just a 3D artist, then maybe I can spike your interest for a field that you aren’t yet familiar with and see its potential to your work.
I was amazed to realize that these two fields not only converge into something unique and beautiful, but also, advancing in one field directly affected the way I was working in the other. There are so many commonalities between the two: Lighting objects, subjects and scenes, choosing the right perspective, working with colored light, creating separation, etc. The difference of course is that with 3D software you sit in front of the computer for many many hours, while with photography you’ll carry expensive equipment to remote locations and battle with real-world problems (like rapidly changing daylight). That’s unless you shoot everything in your studio and, frankly, I think every one sees the logistic appeal to that…
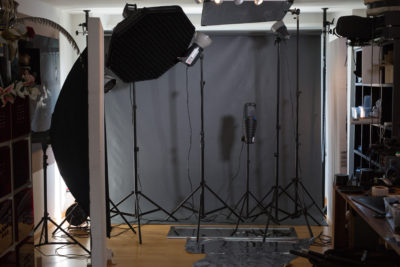
(prepared studio light setup)
Some aspects of 3D modelling and rendering however are actually contrary to what I learned in photography and I think that’s very interesting. The first one is “perfectionism” itself. Photographers strive for perfectionism: clean structures, repetitions, no distractions, a simple, clear composition and message. In 3D you could argue, that you actually start with perfection and try to move away from it. Everything is immaculate at the beginning, every shape, every material, every light. And it takes a long long time to add dirt, cracks, variation, imbalance, surface unevenness etc. So those spots on the wall that a photographer might remove in photoshop are actually added-in by the 3D artist to give it more realism. This strive towards realism sometimes goes almost too far. I’ve seen 3D artist actually add chromatic aberration to their final image. Come on!!! Chromatic aberration! What will they do next? slightly blur their images at the edges? Add barrel/pincushion distortion? On the other hand I’ve seen some photographic work that is retouched to oblivion, especially skin. And people seem to develop an aversion to this plastic skinned models, especially since we are becoming more sensitised to 3D animated humans from the “uncanny valley”. So maybe after some back and forth, photographers and 3D artists will eventually meet somewhere in the middle on the “order vs. chaos” spectrum…
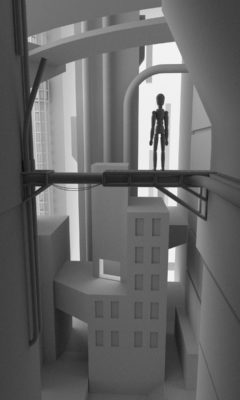

(early stage vs final render)
But let’s return to the tutorial, Sir Digressalot. This is actually my very first video tutorial. For one thing I wanted to see wether I’d enjoy creating teaching content. And I do, I really do. There is certainly a lot to be learned as an instructor. This videos could definitely be shorter, more focussed on one point. Please also excuse some slip-ups in the production quality. I recognise there is a lot of room to improve. But I guess I wanted to simply start somewhere and show you the essential following steps to succesfully blend photography with 3D:
- How to calculate the camera position, height and tilt angle
- How to setup studio strobes so that their light will match the light in the 3D scene
- How to create perspective distortion problems (or when to be lazy about it actually)
- How to adjust the contrast of the photograph so it matches the scene
- How to adjust the colors (especially hightlight color and saturation)
- How to add some effects to the photograph

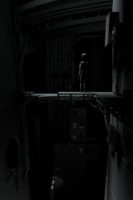

(Lighting reference renders)
Of course, many topics aren’t touched at all. Nothing about the actual 3D modelling, texturing and rendering. Nothing about masking and drawing shadows. These are topics for another video, depending on wether there is demand for it or not.
I hope you enjoy the video!
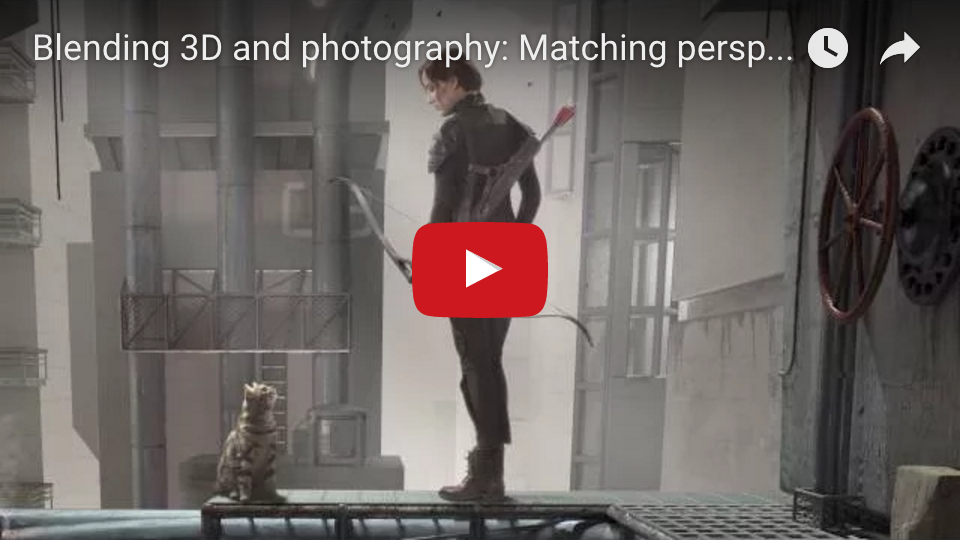
Youtube Tutorial – Blending 3D and photography
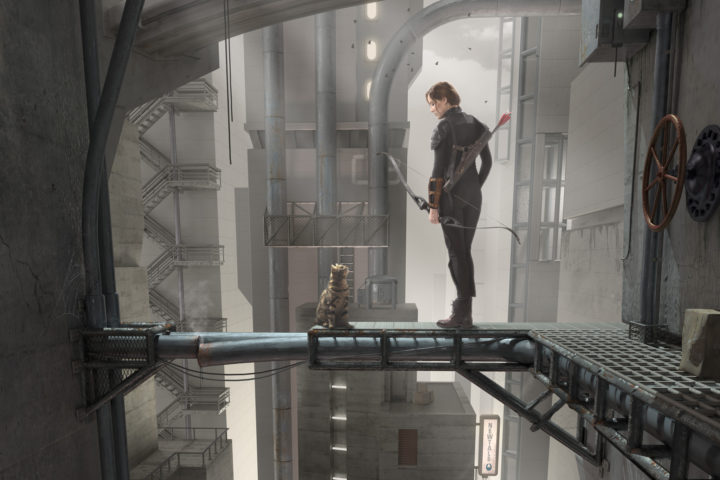
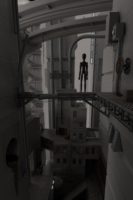
The image by the way is my newest work called “Hunger Games – Random Encounter”. It has been modelled in Cinema 4D and rendered with VrayForC4d. The photo has been shot on a Pentax 645z with my favorite lens, the 120mm F/4 macro. If you are a little more interested in the modelling part of this project, check out my facebook page where I also posted a “behind the scenes” album showing some of the stages of this project: https://www.facebook.com/obsoquasi/photos/?tab=album&album_id=851780521589818
Here is a link to the original, uncropped vertical version of this image:
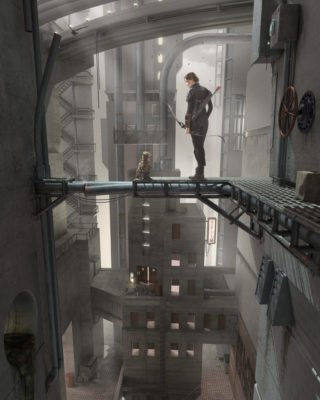
Hunger Games – Random Encounter – Fan Art (Full Version) – John Flury Obsoquasi