What you are going to learn here today
In this short article you are going to learn two things about photorealistic shadows:
a) a little bit of necessary but useful background information about light and shadows
b) how to create 100% photorealistic shadows in Photoshop for one specific (but common!) lighting situation.
The specific situation we are going to solve has the following four prerequisites:
a soft light source, lighting…
a more or less straight object standing on …
a flat surface.
The light source itself is held close to the plane of the flat surface, so that the shadow is elongated. Like the sun close the horizon.
As you will see, even these trivial prerequisites already pose quite the challenge. But with the necessary know-how and technique, you’ll able to create completely photorealistic shadows as well.
Why is it so difficult to reproduce photorealistic shadows in Photoshop?
- zones that lie in shadow aren’t just simply black. They do receive at least some amount of light, however not from the direction of the primary light source but from nearby objects and walls (mostly in the form of reflected light). So when you decide to simply use curves to darken an area that’s supposedly in shadow, you are ignoring this change in light direction and the result will often look fake.
- the shape of the shadow is defined by the shadow-casting object and the angle of the light source. The distance of the light source along with its size defines the softness of the shadow edge (also called “shadow transition zone”)
- The only surface material that does NOT reflect light is matte black. All other surfaces reflect light or at least a portion of the color spectrum. This means, when creating our artificial shadows we must always take all of the nearby surfaces into account, the larger and brighter a surface, the more light it will reflect.
- Ambient occlusion shadows: simply put, light has difficulties to creep into corners. Here is why. The brightness on a specific point on the wall of your room is an aggregation of all the light rays bouncing around and reaching that specific point. If that point isn’t in a corner, there are a lot more surface areas surrounding it from which it can receive reflected light rays. The corner however is limited to only a certain angle from which it can receive light rays. That’s how ambient occlusion shadows are created. In direct light (light that shines directly into a corner), they might be a little less prominent, but if you look around in your room’s corners you’ll find a lot of them. Not just there, your armpit, your wrinkles, everywhere where there’s a corner, ambient occlusion shadows occur.
So you see, there’s a lot to consider. For now though, let’s stick to our simple four prerequisites. Don’t worry, the caveats section at the end will hopefully answer some of your further questions.
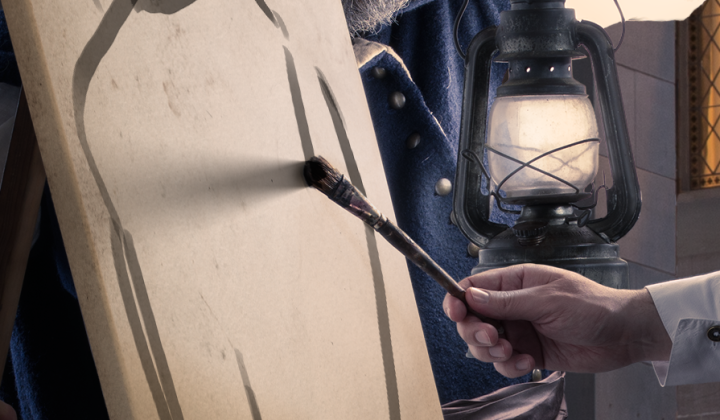
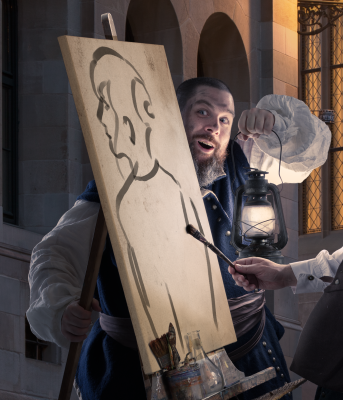
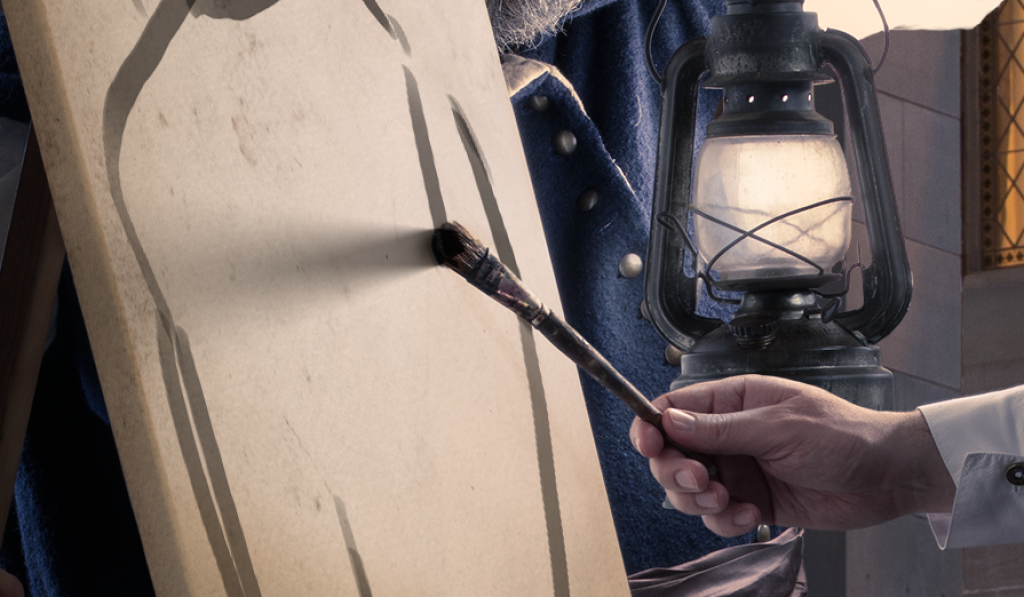
Original image (no shadow yet)
This image is part of my image “Paparazzi – In the Pre-Camera Age”. You can see our four prerequisites: the lantern (soft light source), the brush (shadow caster) and the canvas (shadow receiver), flat angle of attack (= potentially elongated shadows). Even though the lantern isn’t necessarily a huge light source, its proximity to the shadow caster will create a fairly soft shadow on the canvas, what will become even softer with distance. Here is why.
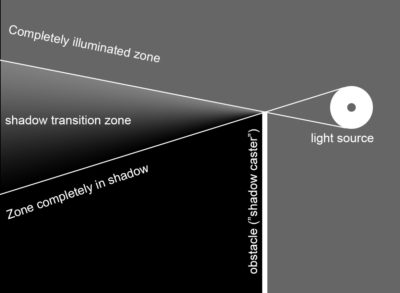
Look at this triangle named “shadow transition zone”. If you’d be standing anywhere within this triangle your view of the light source would be only partially blocked. How much of the light is blocked defines how dark that specific point will be of course. The size and proximity of the light source will define the shape of this triangle. Closer and/or larger light sources will push the left two corners of the triangle apart, hence increasing the are of transition. However regardless of the size and/or distance of the light source at the point of contact between the shadow caster and the surface, there is no transition. Here and only here, we have a hard shadow. But immediately behind this point, the shadow softness increases.
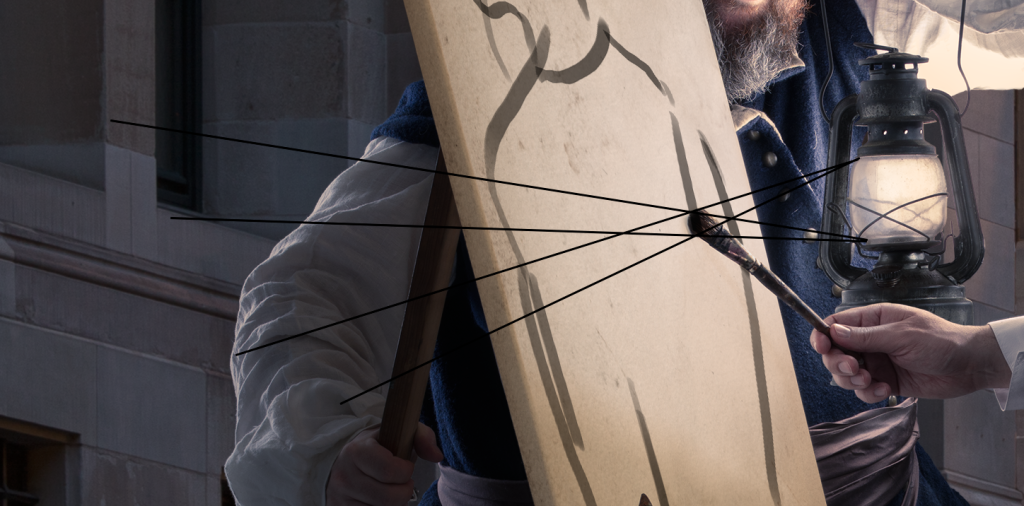
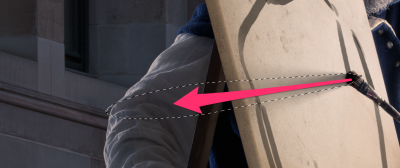
Because our shadow caster has two separate shadow borders (the upper edge of the brush and the lower edge). We will have to deal with two separate shadow transition zones overlapping each other. This overlap will be solved using the blending mode “linear burn” (which you probably never use, right?). Let’s start by drawing some helper lines – using the upper and lower edges of the light source (as seen from the point of the brush) as well as the upper and lower edges of the brush. Make sure you do this on a separate layer, because we’re going to delete it after completion.
How to create a shadow (triangle) that becomes softer with distance?
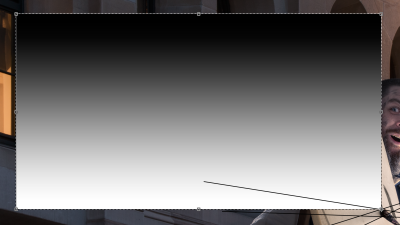
Create a rectangular selection with your selection tool inside an empty new layer. Use the gradient tool (G) to create a gradient from white to black. For now, white will be your shadow and black your light. You’ll see in a minute, why. Tipp: Make sure, the “dithering” option is activated to avoid banding issues.
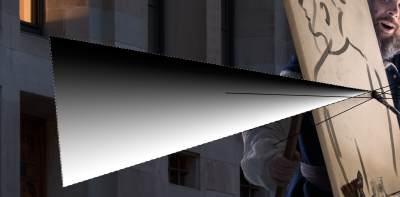
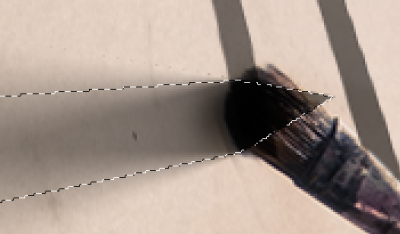
Using the menu command “Edit – Transform – Distort”, reshape your rectangular shape into a wedge shape by collapsing the two right-hand points. While still in transform mode, rotate and align your triangle:
- the collapsed point (right most edge of the triangle), should be on the upper contact point between the brush and the canvas.
- your lower border should be on the line between the transition zone and the zone completely in shadow
- your upper border should be on the line between the transition zone and the completely lit zone.
Do the same thing, for the lower shadow border (make sure your transition is inverted this time). After your transformation step, your result should look like this.
Also clip the two shadow triangles onto a white solid color layer, this will make the next step easier.
Blending the two shadow triangles
Set the blending mode of the two layers holding the shadow triangles to “linear burn”.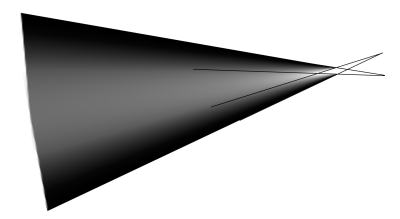
merge both layers into a single layer and use the polygonal lasso tool to fill everything outside the two triangles with black.
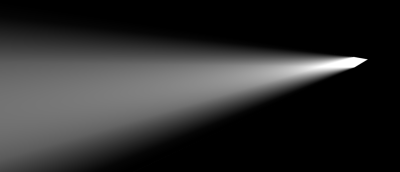
the overall shape and softness of the shadow is now pretty much what we’re looking for. The problem with this shadow shape is however, that it only describes the effect of direct lighting from the light source itself. This is not realistic however. With more distance from the shadow caster, other surfaces will start to fill in this transition zone and lighten it up. So we need to fade out the effect towards the left. And we will do so by first turning our shadow shape into a mask (“shadow mask”) and then using that mask to draw the actual shadow using the gradient tool.
Paint the shadow using a shadow mask and the gradient tool
Switch off all channels that are NOT part of your current shadow shape. Go to channels and CMD-click (Windows: CTRL-click) on one of the RGB channels to create a selection. It will look like this…
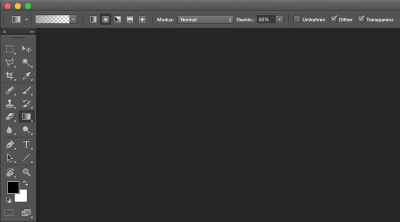
Back to your layer view. Turn the visibility on for all layers except the shadow shape. Create a new empty layer on top. Use your gradient tool (“black to transparent”, opacity 50%, “Radial Gradient” mode). And drag your shadow shape from the point where the brush touches the canvas towards the left.
This looks already pretty good, right? Only one last step on our journey towards photorealistic shadows. All we need now is a little bit of that ambient occlusion shadow.
Ambient Occlusion Shadow
Create another new layer on top – just to be safe. With your selection from before still in place, brush in a tiny amount of black with a soft black brush (low opacity or low flow).
Don’t worry if you paint that ambient occlusion shadow on top of shadow caster (the actual brush in the image). Simply use your layer mask afterwards to mask out that portion.
And that’s it, we’re done!
Caveats
I mentioned that this isn’t a one-size-fits-all solution to creating photorealistic shadows. Here are some additional challenges and how you might get around them.
What about the shape of the shadow caster?
Yes, you are right. We completely took the shape of the shadow caster (the brush) out of the equation, because the angle of attack from the light source was so low, that the actual shape of the brush has been rendered irrelevant with regard to the shape of the shadow. However, if your light sources is further away from the plane of the shadow receiver (here, the canvas). Then of course the shadow’s shape will reflect that of the shadow caster! And you guessed it, now it really gets complicated. What you could try is to adapt to this form in the stage where you transform the (originally rectangular) gradient into a triangle form. Distort won’t help here, you’re going to have to use the “warp” mode. For really complex shapes, I don’t use the method above – but I think of how light is able to enter specific areas behind the object and slowly build up the shadows manually with a soft, low-opacity brush.
What about multiple light sources? Some even with different colours?
Try to focus on the main light source, i.e. the light source that will be brightest from viewpoint of the shadow. If there are other lights, brighten up that shadow accordingly afterwards. If your light sources have different colors, things will get exceedingly complex and frustrating.
What about uneven surfaces, uneven light source shapes, what about…?
Probably my most solid advice on creating shadows is this one:
If you can’t fake it, make it!
Whenever you have the possibility to create a shadow or shadow area photographically, then you should do it. That’s how we did our image Le-Passe-Muraille! It’s actually not as difficult. You just have to think about the areas in shadow. How would the light be able to reach them? Maybe you create a separate exposure only for this area of the image. Or maybe you purposefully shoot on a neutral white or grey so that use the natural shadow or at least have a good visual template to recreate it using Photoshop brushes.
I hope this article has helped you to grasp the basics of photorealistic shadows. And I hope my technique helps you to create your own photorealistic shadows and cheat your viewers eyes to your heart’s content ;).

